How To Setup Magento Newsletter
If you are reading this, then obviously you know how important newsletters are. Newsletters are the primary means of communication from the site owner to the customers subscribed to the site’s newsletter. All major CMS has the newsletter option in them and Magento is no different.
There are several ways a customer can subscribe to a site’s newsletter in Magento. 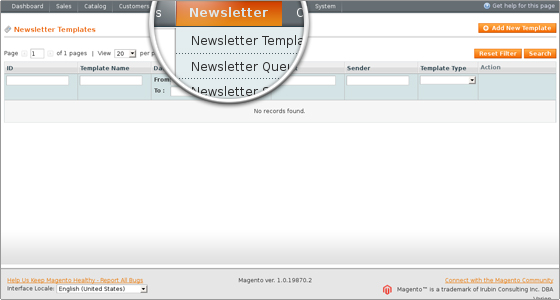 One way is when a user creates a new customer account; there’s normally a checkbox for signing up for the newsletter. For already registered customers, they can subscribe for newsletter from the settings of their account. By default, guests are also allowed to subscribe. They can do this by using the Newsletter block on the frontend.
On the other hand, merchants/store owners can also subscribe or unsubscribe a customer. This is done from the admin panel by clicking on Customers>Manage Customers. Mark the check boxes of the customers and use the Actions drop-down menu in the top right corner of the table listing the customers to select whether you want to subscribe or unsubscribe them.
Once you have active newsletter subscriptions you have to create a newsletter template(s) and send the newsletter(s).
To do this go to Newsletter>Newsletter Templates in your admin panel and click on the Add New Template button. The template will be used to display the actual message that’s sent to the subscribers. On the page that opens after you click on the button there are a few settings that you have to configure. In the respective fields type a name for the template (it’s for internal use), a subject to be shown in the Subject field of the emails sent to the subscribers, and optionally change the sender name and sender email address. Use the built-in text editor to type the content of the template. After that click on the Save Template button. You can create as many templates as you need.
After you have one or more templates go to Newsletter>Newsletter Templates and select the template that you want to use for the particular newsletter. Use the Action drop-down menu of the template and select Queue Newsletter. This will display a page with some settings. On that page you can select the date on which the newsletter is to be sent. You can select one or more store views associated with your store(s). The newsletter will be sent only to the customers who have subscribed from the selected store view(s). You can also edit the subject, sender name and email address, and the actual message. They are imported from the selected template. After that click on the Save Newsletter button. The newsletter will be queued and will be sent on the date that you selected. If you go to Newsletter>Newsletter Queue in your admin panel you can view all queued newsletters.
You also have to set up a cron job. Otherwise, no newsletter will be sent. You can do this from the Cron Jobs section of the Pixie control panel. Add a new cron job, select the frequency and type the cron command. Assuming that your Magento is installed directly in the public_html folder on your Magento hosting account, then the command should look like this:
php -f /home/username/public_html/cron.php
(change username with your real username).
Depending on the frequency of the cron job you may also need to configure the cron related settings in your Magento admin panel. They are located in System>Configuration>System button in the Advanced section on the left>Cron (Scheduled Tasks) panel on the right. In particular you may need to set a higher number for the setting Missed If Not Run Within.

