How To Download And Install Magento
If you have decided to build your e-commerce website with Magento, it’s now time to start the process by first downloading and installing the Magento software. Before installing Magento however, here are the minimum requirements to meet.
PHP 5.4 or higher
Apache 2.2.x or higher
MySQL DBMS platform of version 4.1.20 or higher
Make sure you have the administrator rights for the installation of any program.
Downloading Magento
It is recommended to visit the Magento website for a proper of Magento and all it’s modules. However this tutorial uses the expertise of Bitnami. Bitnami is all encompassing as it has it’s own Apache and Mysql services.
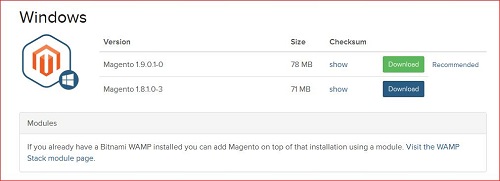
To download the Bitnami Magento, visit this link and select the version for your operating system.
Installation(Windows)
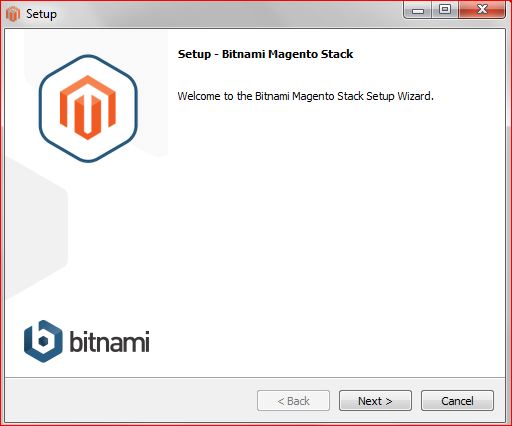
Step 1:
Run the downloaded file to start the program. It will start by setting up the Bitnami Magento stack with a window similar to the one alongside. Just click on Next.
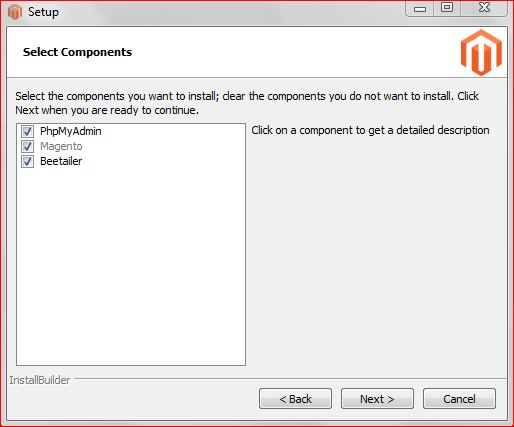
Step 2:
You will be asked to select components; all are usually selected by default. Just leave them the way they are. Click Next.
Step 3:
Your IP address shall be automatically detected. If you are on LAN network, it will enter the address of your LAN network, but if you’re offline, it will simply show you 127.0.0.1 which is a default address for localhost.
Step 4:
You will now be asked to specify some login credentials so input your name, email address, user name, and password as shown alongside. Make sure you remember the user name and the password because you will use them to access the administrator dashboard.
Step 5:
On the next window you will be asked if you want to learn more about Bitnami Cloud Hosting. You can uncheck this, because it may not be important for now then click Next.
The software will start installing and prompt you to allow access of httpd.exe file, which is the Apache server of Bitnami. If you uncheck that option, the firewall will be blocking this program. Check all and click Allow Access.
Step 6:
The next window, you will be prompted if you want to learn about integration of Bitnami on Facebook. You can uncheck this since it is not important for now.
Step 7:
At this step, two things will happen:
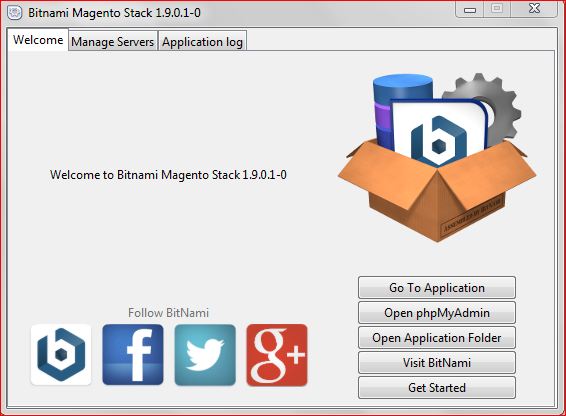
The Bitnami Magento stack will pop up
Your default browser will open with the administrator’s PC address as shown in the diagram.
Step 8:
This step is only important if you have installed more than one program that uses the same default port number of 80.
On the Bitnami Magento Stack pop-up manager window, you can configure your Apache and MySQL configuration by clicking on manage servers tab then click on Apache or MySQL depending on the one you want to change the port number.
A pop up will show up that prompts to change the port number. Change the port number then click ok and click restart on the parent window shown alongside in order to save the settings and restart the apache with new settings.
That’s all. If you have followed these steps carefully, congrats, you have successfully installed Magento.

